Once upon a time, I made a delicious batch of chocolatey rich brownies with a secret ingredient: a little orange kiwi favourite called kumara. Starchy tubers like kumara can be a great substitute for flours, and are
a more nutritious alternative to gluten free flour blends. It can sound a bit crazy - and I get very sceptical looks and comments every time I use them, but you'll just have to trust me on this one. Those brownies speak for themselves. Now for reasons unbeknownst to even me, I haven't featured the kumara brownie on this blog (yet!) but keep your eyes peeled because it's a recipe you'll want to write down and treasure for ever.
In the meantime, here is another kumara recipe. This one is a yummy, filling, bite-sized muffin with a little something different in each chew. This is definitely a muffin rather than a cupcake, and probably sits at cafe-style-carrot-cake on the savoury to sweet spectrum. As for the name: "flourless four fruit muffin bites"...? These little morsels are crammed with goodness, including banana, apple, dates and kumara! Now, I know kumara isn't technically a fruit, but come on, don't you love that alliteration?! I used mini-muffin silicone moulds to make mine, but they could also work as jumbo-sized muffins for an on-the-go breakfast option, as long as the cooking time was adjusted.
These muffins are gluten and dairy free, but remember to warn guests about the nuts, nut butter and seeds if you have allergy-prone friends.
Flourless Four Fruit Muffin Bites (makes 24 mini muffin bites)
Saturday, March 12, 2016

Saturday, February 13, 2016
Valentine's Day Menu for Dummies: Three Course Meal (affordable, gluten free, grain free option)
So, I thought with it being Valentine’s Day, it would be an
ideal time to put together a “date night” menu.
Since I’m livin’ la vida solo, most of the recipes I post are “serves
one”, but I wanted to post something a bit special and different. Below is a “serves two” three course meal
that is affordable, easy to make, and just a little bit fancy. You can do a lot of the prep ahead of time,
especially with the dessert, and it would be easy to bump up the servings to
cater for your triad/group date/Galentine’s Day Party/etc.
Here is what the menu looks like:
Starter
Moules Marinière Avec Une Petite Salade
Moules Marinière Avec Une Petite Salade

Main
Leek & Bacon Risotto
Leek & Bacon Risotto

Dessert
Black Doris Plum and Dark Chocolate Parfait
Black Doris Plum and Dark Chocolate Parfait

Doesn’t that sound super fancy? The recipes are fairly simple
to follow and use ingredients that are easy to find and in season this time of
year. The whole menu is gluten free, and I’m also giving you a grain-free
option for the main course, just in case.
Allons-y!
Saturday, January 30, 2016
EHOB Part 4: Making Stock From Scratch
It would seem that "bone broth" was right up there in terms of 2015's health food trends. I have seen the savoury liquid lauded as a cure-all, which is not surprising considering its mineral and protein content and its long history in the human diet. It is a little bit much, though, to see simple ol' stock hitting the superfood health-claim trifecta: it apparently heals the gut, detoxifies the body, and reduces cellulite! Gee whiz, that's a reputation to live up to isn't it? I can't find much in the way of scientific evidence to support these bold claims (not surprising!), but that doesn't mean I'm not a big fan of homemade bone broths and stocks.
Having homemade stock at hand is a cheap and delicious way to add a bit of pizazz to your home-cooked meals and - despite what is suggested by the number of complex recipes passed down through generations and uploaded to the internet - it's a pretty forgiving dish for a new chef. Stock makes a great base for soups and sauces and you can use it to cook rice and quinoa; it also does well solo as a warming drink on a cold day. It is indeed nutrient dense, much more so than shop-bought stock, and the benefits in nutrition and flavour so far outweigh that of, say, stock cubes, that it should be a no-brainer to make your own if you can!
You only really need three things handy for a DIY stock: bones, water, and a big pot. Everything else is extra but will help make the resulting stock more tasty. Let me break it down for you.
Having homemade stock at hand is a cheap and delicious way to add a bit of pizazz to your home-cooked meals and - despite what is suggested by the number of complex recipes passed down through generations and uploaded to the internet - it's a pretty forgiving dish for a new chef. Stock makes a great base for soups and sauces and you can use it to cook rice and quinoa; it also does well solo as a warming drink on a cold day. It is indeed nutrient dense, much more so than shop-bought stock, and the benefits in nutrition and flavour so far outweigh that of, say, stock cubes, that it should be a no-brainer to make your own if you can!
You only really need three things handy for a DIY stock: bones, water, and a big pot. Everything else is extra but will help make the resulting stock more tasty. Let me break it down for you.
Thursday, January 28, 2016
Chicken Quesadillas + Homemade 100% Corn Tortillas
Ok, it took a little longer than expected but I'm getting there with the chicken recipes! The first is a gluten free quesadilla recipe made using home-made tortillas. You heard me: home-made! It's sounds more daunting than it should, and as with anything made from scratch, it is worth the little bit of extra effort.
I first taught myself how to make tortillas after I chanced upon some tortilla flour in a bulk food store. The flour used to make tortillas and corn chips is different to anything I've worked with before; it's called masa harina and it is made from corn. It's prepared very differently from corn flour or polenta: the corn kernels are treated with an alkaline solution that, basically, affects the cell walls of the corn in such a way that it is able to form a dough when mixed with water. The chemistry is quite interesting to read about if you're into that kind of thing but the main takeaway is that you can't sub in regular corn meal! I haven't seen masa flour in supermarkets, but I have seen it at Bin Inn and in online stores so it's not too hard to get hold of.
Making my own tortillas was an awesome culinary breakthrough for me, since I have had trouble finding 100% corn (i.e. wheat-free) tortillas that aren't also crazy expensive, and because I love making any kind of food from scratch! These are not hard to make at all, and while it might take you a bit of practice to find a technique that works for you to get the tortillas thin and flexible, eating the "practice" tortillas is not something I'd complain about in a hurry! If you get any real duds (fingers crossed no!), maybe a too-thick tortilla that won't bend or a too-thin tortilla that breaks apart, you can always cut them up and fry or bake them with some olive oil for home-made corn chips.
I am only using my phone's camera to visually document these recipes and the light was fading fast so I didn't get the greatest snaps, however I wanted to provide photos to show you what the dough should look like and to better demonstrate how I roll it out. I assure you the final product is much prettier in real life, and regardless, you musn't judge a book by its cover, nor a quesadilla by its amateur photographic representation.
Gluten Free Chicken Quesadillas (makes 10, serves 2)
I first taught myself how to make tortillas after I chanced upon some tortilla flour in a bulk food store. The flour used to make tortillas and corn chips is different to anything I've worked with before; it's called masa harina and it is made from corn. It's prepared very differently from corn flour or polenta: the corn kernels are treated with an alkaline solution that, basically, affects the cell walls of the corn in such a way that it is able to form a dough when mixed with water. The chemistry is quite interesting to read about if you're into that kind of thing but the main takeaway is that you can't sub in regular corn meal! I haven't seen masa flour in supermarkets, but I have seen it at Bin Inn and in online stores so it's not too hard to get hold of.
Making my own tortillas was an awesome culinary breakthrough for me, since I have had trouble finding 100% corn (i.e. wheat-free) tortillas that aren't also crazy expensive, and because I love making any kind of food from scratch! These are not hard to make at all, and while it might take you a bit of practice to find a technique that works for you to get the tortillas thin and flexible, eating the "practice" tortillas is not something I'd complain about in a hurry! If you get any real duds (fingers crossed no!), maybe a too-thick tortilla that won't bend or a too-thin tortilla that breaks apart, you can always cut them up and fry or bake them with some olive oil for home-made corn chips.
I am only using my phone's camera to visually document these recipes and the light was fading fast so I didn't get the greatest snaps, however I wanted to provide photos to show you what the dough should look like and to better demonstrate how I roll it out. I assure you the final product is much prettier in real life, and regardless, you musn't judge a book by its cover, nor a quesadilla by its amateur photographic representation.
Gluten Free Chicken Quesadillas (makes 10, serves 2)
Sunday, January 24, 2016
EHOB Part 3: Make 9 Meals With One Chicken!
As noted in a previous post, last week my local supermarket
was selling size 16 whole fresh chickens for $9 (the standard price for a
chicken that size is around $15). The
weight of a size 16 bird is approximately 1.6kg, so you’re paying about $5.60
per kilogram at the sale price, which is a very good deal indeed. Buying a
whole chicken is one of my favourite budgeting hacks, since you can get a lot
of use out of the meat and bones. I can usually make a standard bird last for
six chicken dishes and three or four servings of soup. And I want to share with
you how I do it!
The first thing you need to do of course is cook the
chicken. There are a couple of ways to
do this (slow cooking, barbecuing, beer can method, the list goes on…) but I
think the safest and easiest is to roast the chicken in the oven. Most whole chickens actually come with roasting
instructions on the back of the bag. Let’s
be honest, it’s a pretty simple task, and I don’t think giving you a recipe for
roasted chicken is a good use of our time! However I can give you a couple of
tips to make sure this simple task doesn’t become a hilarious story about that
time you failed at roasting a chicken!
My first tip is, and I have mentioned this before, cook a
couple of things in the oven at once.
This could be a baked fruit dessert, a loaf of bread, or some veggies to
go with the chicken. Heating an entire
oven takes a fair amount of electricity and therefore costs money at the end of
the month, so cook as much as is sensible while the oven is hot. I was asked recently if cooking more than one
thing in the oven greatly affected the cooking time. The short answer is not
really but it depends. The temperature and humidity differences are negligible
and the general rule of thumb for cooking time is “it’s done when it’s done” not
“remove from oven after 33 minutes and 15 seconds”! If you’re making temperature-sensitive dishes
like pastries and soufflés, then it can be an issue but generally speaking, and
for most household cooking, it’s not something you need to worry about.
Thursday, January 21, 2016
Choc-Top Banana Bread (gluten and grain free, with vegan option!)

Wednesday, January 20, 2016
No Fuss, No Grain (Banana) Pancakes
I love pancakes with all my heart, and have written about them at great length in a previous post. In my searches to find a good, healthy, preferably grain-free, pancake I've found that the internet only seems to host recipes sitting at extreme ends of a very odd scale. On the one hand, there are ingredients lists typical of many gluten free endeavours: five kinds of flour, two or three raising agents, and at least one kind of gum you can't pronounce. On the other hand, there are those who oversimplify: one or two ingredients, boldly going where no gluten free chef has gone before!
I have to admit that this recipe for banana pancakes sits on the latter end of the spectrum, and is offspring of the dreaded "two ingredient miracle pancake". You know the one. Headlined by bold claims like "these really work!", "won't burn in the pan!" and "so quick and easy!". I had expectations of that recipe. I read tips on paleo and gluten-free forums. I tried, internet, I really did. The trick is to use ONE egg. No, three! The pan needs to be extra hot! Extra low! Use lots of oil, no oil, try adding baking powder, maybe there's something wrong with your spatula?
How about, maybe, there's something wrong with your recipe?
The "two ingredient miracle pancake!" is a myth and I am here to debunk it. You can not make pancakes with a banana and an egg. After a very small amount of tweaking, and the addition of a few pantry staples, I found a ratio of ingredients that works every time and perfected a flipping technique that's simple and effective. A bonus with this recipe is that you aren't stuck using bananas! Other starchy vegetables, like pumpkin and kumara work really well too, so you can have a bit of variety in your breakfasts and desserts. I recommend added a bit of stevia and spice if you go down that route as bananas offer a lot in the way of flavour and sweetness, but knowing you can sub in other veggies gives you another means of using up leftovers!
The below recipe serves one, and makes a complete breakfast, packed with proteins, fats and carbohydrates to keep your appetite at bay all morning.
I have to admit that this recipe for banana pancakes sits on the latter end of the spectrum, and is offspring of the dreaded "two ingredient miracle pancake". You know the one. Headlined by bold claims like "these really work!", "won't burn in the pan!" and "so quick and easy!". I had expectations of that recipe. I read tips on paleo and gluten-free forums. I tried, internet, I really did. The trick is to use ONE egg. No, three! The pan needs to be extra hot! Extra low! Use lots of oil, no oil, try adding baking powder, maybe there's something wrong with your spatula?
How about, maybe, there's something wrong with your recipe?
 |
| pancakes made with mashed pumpkin, sweetener, and cinnamon |
The below recipe serves one, and makes a complete breakfast, packed with proteins, fats and carbohydrates to keep your appetite at bay all morning.
Eating Healthy on a Budget: Food Diary #2
Hello all, thank you for you patience! Here is the second half of my food diary for the first week of this series. As a bonus, my flatmate returned from a trip home with a substantial harvest of home-grown plums, three cheers for fresh fruit!
It's been seven days since my shop, what am I left with? On Thursday morning I had two eggs and a banana spare for a pancake breakfast. Otherwise, I am left with just a small amount of lettuce, one remaining potato, the tinned corn, and half the cheese. This means that none of the produce has gone to waste and that I bought a good amount of food to last the week. I was lucky to be able to get a few free snacks, from the haul of plums, but I have enough odds and ends in the pantry that I could have easily made it work without. I have been a little lacking in appetite this week for a few reasons, and it has been too hot for my morning run, so it would be usual for me to eat a little more than this (I often snack on flourless, sugar-free mug cakes to top up for the day but didn't feel the need this week). The following is the remainder of my food diary, and below is my intention for shopping and blogging this week. Enjoy!
Sunday
Breakfast - Pumpkin pancakes and a banana on the side (recipe!)
Lunch – Lettuce and cucumber salad with lots of olive oil
It's been seven days since my shop, what am I left with? On Thursday morning I had two eggs and a banana spare for a pancake breakfast. Otherwise, I am left with just a small amount of lettuce, one remaining potato, the tinned corn, and half the cheese. This means that none of the produce has gone to waste and that I bought a good amount of food to last the week. I was lucky to be able to get a few free snacks, from the haul of plums, but I have enough odds and ends in the pantry that I could have easily made it work without. I have been a little lacking in appetite this week for a few reasons, and it has been too hot for my morning run, so it would be usual for me to eat a little more than this (I often snack on flourless, sugar-free mug cakes to top up for the day but didn't feel the need this week). The following is the remainder of my food diary, and below is my intention for shopping and blogging this week. Enjoy!
Sunday
Breakfast - Pumpkin pancakes and a banana on the side (recipe!)
Lunch – Lettuce and cucumber salad with lots of olive oil
Snack – Tangelo
Dinner – Quick Spanish stew-like dish of fried chorizo, 1/2 tin of diced tomatoes, 1 diced carrot, 1 tbsp olive oil, topped with grated cheese
Protein: 49g
Monday
Breakfast - Brown rice porridge with a sliced banana and splash of soy milk, 1 plum
Lunch - Lettuce, cucumber and tomato salad with tuna
Snack - 1 plum
Dinner - Spanish tortilla, served with mixed veggies and a handful of grated cheese.

For those unaware, a Spanish tortilla, or Spanish omelette, is a dish similar to a frittata, consisting of just potatoes and egg (and sometimes onion, depending on who you ask!). It's a really simple dish, full of protein and healthy starches, totally delicious, and very budget-friendly. One tortilla (5 or 6 eggs and one medium potato) makes two serves or four snacks.
Protein: 48g
Tuesday
Breakfast - Smoothie: 1 banana, 1 tbsp cocoa, 1 cup soy milk, 1 plum, 1 tbsp quinoa flakes
Quinoa flakes are another handy to thing have in the pantry, but are definitely on my "luxury items" list!
Lunch - Lettuce, tomato, cucumber salad with tuna and olive oil
Snack - 1 plum
Dinner - Spanish tortilla, served with mixed veggies
Protein: 57g
Wednesday
Breakfast - Banana pancakes
Lunch - Lettuce and cucumber salad with tuna (my last tin!)
Snack - 1 plum
Dinner - Lamb stew with quinoa, left over from earlier in the week
Protein: 56g
Monday
Breakfast - Brown rice porridge with a sliced banana and splash of soy milk, 1 plum
Lunch - Lettuce, cucumber and tomato salad with tuna
Snack - 1 plum
Dinner - Spanish tortilla, served with mixed veggies and a handful of grated cheese.
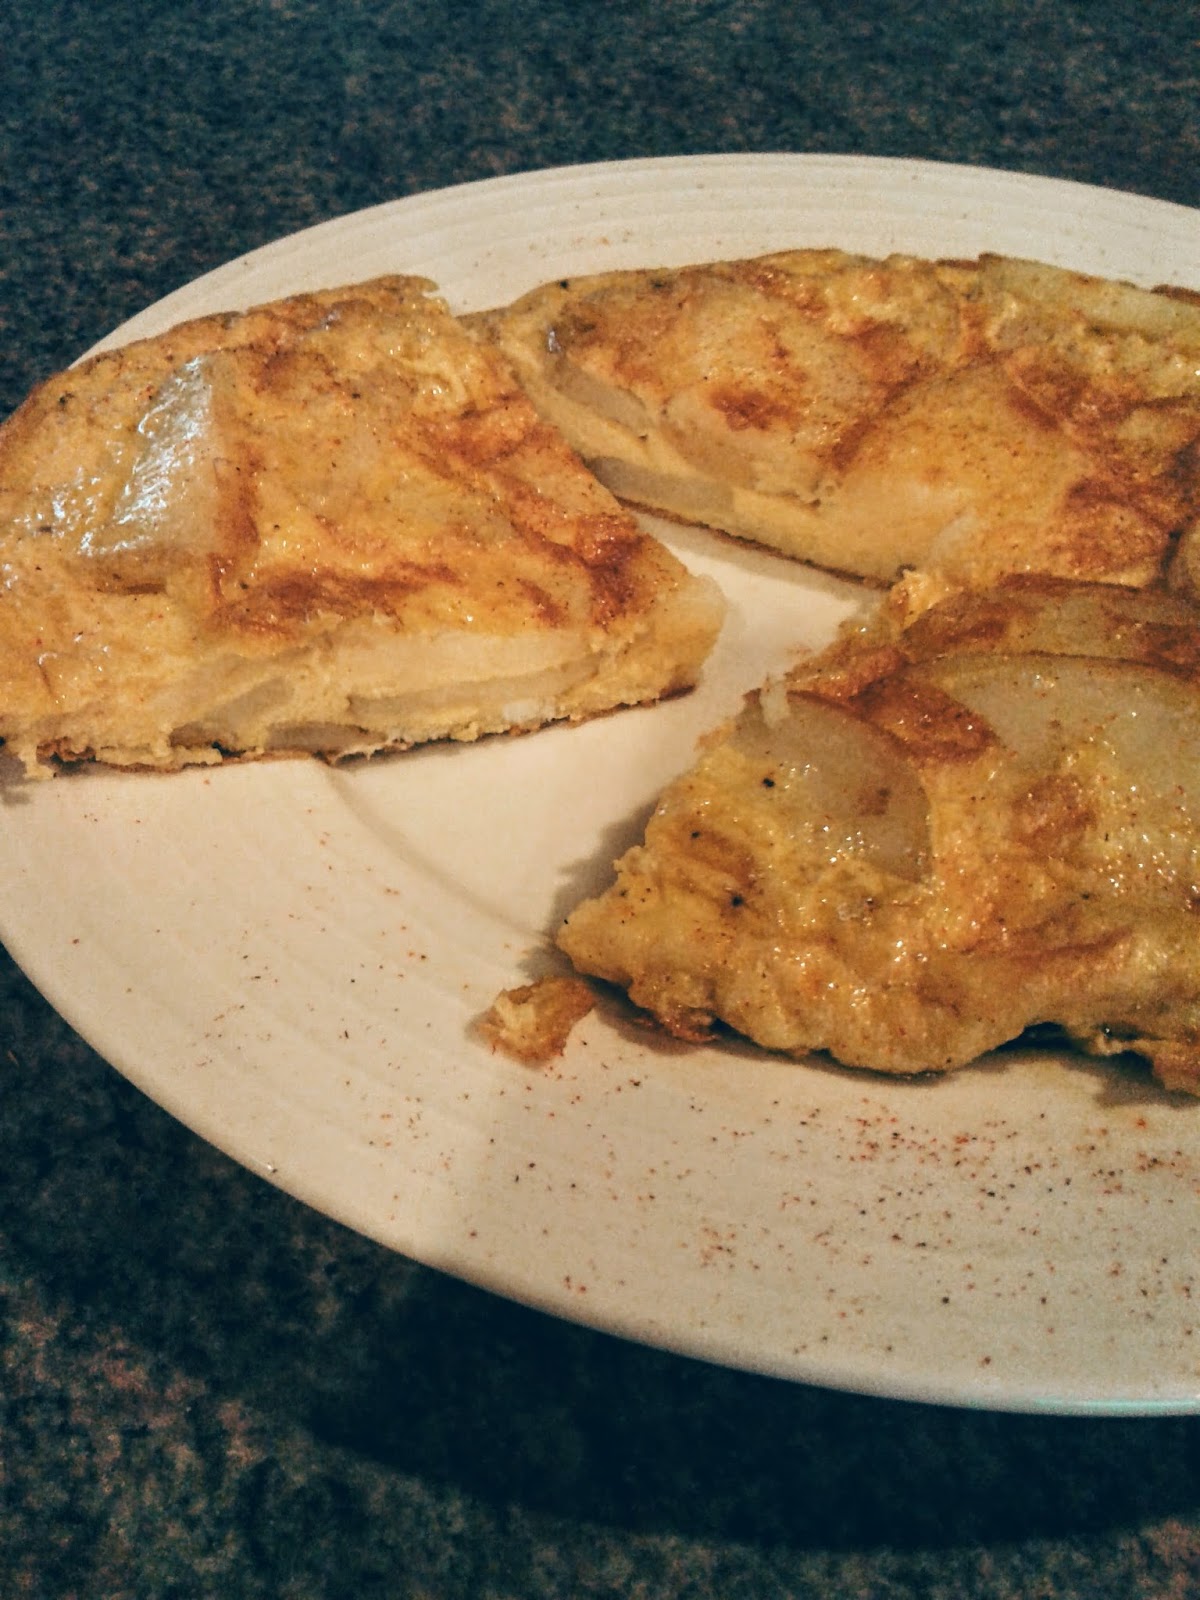
For those unaware, a Spanish tortilla, or Spanish omelette, is a dish similar to a frittata, consisting of just potatoes and egg (and sometimes onion, depending on who you ask!). It's a really simple dish, full of protein and healthy starches, totally delicious, and very budget-friendly. One tortilla (5 or 6 eggs and one medium potato) makes two serves or four snacks.
Protein: 48g
Tuesday
Breakfast - Smoothie: 1 banana, 1 tbsp cocoa, 1 cup soy milk, 1 plum, 1 tbsp quinoa flakes
Quinoa flakes are another handy to thing have in the pantry, but are definitely on my "luxury items" list!
Lunch - Lettuce, tomato, cucumber salad with tuna and olive oil
 |
| #mealprep |
Snack - 1 plum
Dinner - Spanish tortilla, served with mixed veggies
Protein: 57g
 |
| Recipe, as above |
Breakfast - Banana pancakes
Lunch - Lettuce and cucumber salad with tuna (my last tin!)
Snack - 1 plum
Dinner - Lamb stew with quinoa, left over from earlier in the week
Protein: 56g
It's supermarket day today. I'm aware for my shop that I still have my frozen vegetables and oven fries in the freezer, and I've checked the in-store specials - if you are in NZ and ready to shop today, Countdown is selling size 16 whole fresh chickens for $9, which is a decent price, and I'll be describing how to make the most of a whole chicken in the blog this week. I will also be posting some recipes, starting later today with no-grain pancakes and continuing with a few more simple baking recipes. If you have any questions or comments, let me know!
Sunday, January 17, 2016
Kitchen 101: Making the Most of Your Freezer
Update 19/1/16: I've had a comment from a reader with regards to food safety and the quick-cooling of foods and I want to make it clear that hot foods need to be cooled as quickly as possible before freezing. The best way to cool hot liquids is through use of an ice bath, while solid foods can be cooled in shallow containers (place in the fridge once they have stopped steaming). Click here to read the guidelines on cooling and reheating foods by Food Standards Australia New Zealand, and click here for a very helpful article on food safety and storage.
This post is geared more towards kitchen newbies, whether you have just moved out of home for the first time, or are simply new to cooking from scratch. The following are my top five tips for making the most of your freezer to save both time and money.
This post is geared more towards kitchen newbies, whether you have just moved out of home for the first time, or are simply new to cooking from scratch. The following are my top five tips for making the most of your freezer to save both time and money.
5. Cook in Bulk
This is the most obvious one. This is even easier if, like me, you are cooking for one most of the time; following a mantra of “eat one, freeze one” will save up time and effort at a later date. Having pre-cooked meals ready to go can also be a life-saver at the end of pay-week or if an unexpected expense creeps up.
While the first things that spring to mind when I think of typical freezer foods are casseroles, soups, and stews, almost anything you cook can be frozen – I regularly freeze meals like stir-fries and risottos. You can think bigger with batch-cooking too. Some foods are considerably cheaper when bought in larger portions, think whole frozen chickens or large halves of pumpkin, and these can be roasted or baked all at once and then separated up and stored to make a variety of meals at a later time. I find doing this great to add variety if I’m getting bored: eating seasonally sometimes means one or two cheap vegetables take up too much space in my diet for months at a time!
This is the most obvious one. This is even easier if, like me, you are cooking for one most of the time; following a mantra of “eat one, freeze one” will save up time and effort at a later date. Having pre-cooked meals ready to go can also be a life-saver at the end of pay-week or if an unexpected expense creeps up.
While the first things that spring to mind when I think of typical freezer foods are casseroles, soups, and stews, almost anything you cook can be frozen – I regularly freeze meals like stir-fries and risottos. You can think bigger with batch-cooking too. Some foods are considerably cheaper when bought in larger portions, think whole frozen chickens or large halves of pumpkin, and these can be roasted or baked all at once and then separated up and stored to make a variety of meals at a later time. I find doing this great to add variety if I’m getting bored: eating seasonally sometimes means one or two cheap vegetables take up too much space in my diet for months at a time!
Saturday, January 16, 2016
Eating Healthy On A Budget: Food Diary #1
So, Auckland suddenly decided to crank out the summer
weather and the heat has done a really great job of zapping me of my appetite
the last few days. I mean who wants to stand over a hot pan with 27°C sunshine blasting
through the window? Being personally cooked is also draining my brain energy a
little so the witty and coherent post I wanted to write is going to have to
wait until tomorrow, when I will be comfortably and coolly seated at my air-conditioned
desk.
The amount of time I’ve spent ducking into the freezer for ice cubes this week has encouraged me to post about how one can efficiently make use of frozen foods so, that shall be tomorrow’s read. For today, I am going to share my food diary since buying my weekly shop.
The amount of time I’ve spent ducking into the freezer for ice cubes this week has encouraged me to post about how one can efficiently make use of frozen foods so, that shall be tomorrow’s read. For today, I am going to share my food diary since buying my weekly shop.
This feels a little weird and personal but I think that it’s
the best way to show how I do what I do! I’m going to include the approximate
amount of protein eaten each day, according to calculations made with MyFitnessPal.
Proteins are essential nutrients and seem to be the first thing people panic
about when anyone changes their diet (as anyone who’s ever gone vegetarian can attest!).
According to the NZ Nutrition Foundation, the minimum RDI of protein for a
woman my age is 46g (source)
and as you will see I easily achieve that in my day to day diet. This stuff is important to know because
eating less red meat is a great way to save a few dollars, and doing so doesn’t
have to negatively impact your health.
If you have questions about any of the meals, or would like
to see recipes, please let me know and I’ll do my best to answer :)
Wednesday, January 13, 2016
Eating Healthy On A Budget Part 2: Forty Dollars Worth of Food
I did my weekly shop today, first hitting up Countdown after checking the specials online, and then heading to my local veggie shop on the way back.
Here is how I went at Countdown:
 | |||
| $21.88 worth of noms |
1 x tin of diced tomatoes: 80c
1 x tin of corn kernels: 89c
4 x tin of tuna (95g): $1 x 4 = $4
1 x soy milk: $2.50
1 x lemon: $1.05
1 x 208g basa fillet: $2.08
1 x lamb leg steak: $4.56
1kg brown rice: $2.50
1 dozen eggs: $3.50
Total: $21.88
I made up a list using the online shopping tool that came to about $19 that looked similar to the above, but included an extra tin of tomatoes and an extra tin of tuna, but no lamb and half the amount of rice. I scanned the Quick Sale area of the meat and picked out the lamb, and also spotted the 1kg rice on special and an in-store deal on basa fillets. By swapping out a couple of tins I was able to stay within a reasonable budget and get more variety. Thrilling stuff! But it's in-store decisions like this that are important for frugality and I think it's a good example of how a little research and prep can go a long way. I mean, red meat? On my budget? :)
How I went at the veggie shop:
Eating Healthy on a Budget Part 1: Intro & Basic Shopping Tips
Ok, I'm trying a new thing and I'm not sure how it's going to go! I've been asked a couple of times, particularly by people who've lived with me, how I'm able to eat healthy food most of the time while on a teeny tiny budget. This is a great question, and I'm never 100% sure how to answer. My guess is that it's been a combination of time, practice and slow-and-steady changes to the way I handle my finances and the kind of foods I eat. It took me several years to switch from a run of the mill kiwi diet to the Mediterranean-style, produce-focussed diet I currently eat and it takes time, effort, planning and a reasonable amount of cooking knowledge to eat the way I do on the meager student budget I subsist on.
That's the short answer! In order to provide the long answer, I am going to do some write-ups on my weekly shopping and menu, as well as provide some pantry hacks along the way. I am not going to make promises about how often I will write but my intention is to show what I buy week to week, how much I actually spend, and at the very least let you know my meals each day. I'm no expert, but I can show you what I do. Ideally, I will be sharing some recipes too!
So you can get an idea of what my budgetary situation is like, and how my lifestyle affects my pantry, here are some basic things you should know about me:
That's the short answer! In order to provide the long answer, I am going to do some write-ups on my weekly shopping and menu, as well as provide some pantry hacks along the way. I am not going to make promises about how often I will write but my intention is to show what I buy week to week, how much I actually spend, and at the very least let you know my meals each day. I'm no expert, but I can show you what I do. Ideally, I will be sharing some recipes too!
So you can get an idea of what my budgetary situation is like, and how my lifestyle affects my pantry, here are some basic things you should know about me:
- I work sometimes as an extra, but the work available is haphazard at best! My guaranteed income is minimal so, to be brief, I have a budget of $40 a week for food. I know that income is not an appropriate topic for polite conversation, but in this discussion, it's kind of essential.
- I don't drink alcohol - a major money saver!
- I avoid processed foods as much as possible
- I avoid waste as much as possible (whether it's unrecyclable packaging or perfectly edible leftovers)
- I am gluten free at the moment for health reasons - if you can eat gluten, go for gold, I have no vendetta against this handy protein!
- I am probably addicted to chocolate, having it in my diet is non-negotiable :)
- I only have to feed myself. I don't have any children or dependents or even a partner to feed which I know makes things a lot easier.
Wednesday, December 9, 2015
Christmas Recipe: Vegan Brandy Fudge Truffles
This recipe doesn't need a massive introduction, it's just the joy of the Christmas rum ball, made healthy! I honestly think these are easier than the crushed biscuit variety and arguably more delicious. I used brandy flavoured essence because I prefer it to rum but the traditional flavour would work just as well, or you could use vanilla if the boozy flavour isn't your thing! The finished sweet is soft and fudgy and chocolatey and safe for all your vegan and gluten-free friends to chow down on.
2 cups pitted dates, soaked in water overnight, and drained
3 tablespoons unsweetened cocoa powder
2 tablespoon melted coconut oil
1 teaspoon brandy flavoured essence
dessicated coconut for rolling
If you have a good quality blender, then this is easy - blitz all the ingredients until smooth. If, like me, you aren't blessed with the disposable income a good blender requires, this recipe is still totally do-able. Chop the dates into four pieces each, place in a mixing bowl with the melted coconut oil and mash and stir with a wooden spoon until smooth. Add the cocoa powder gradually and keep mixing so there are no dry lumps. The more you stir the smoother it will get, I promise.
Use a teaspoon to measure out each truffle then roll in dessicated coconut until it's able to hold its own shape.
Refrigerate for an hour before serving, and keep in the fridge if it's a warm day.
 |
| sorry about the sad photo, they got eaten pretty quick! |
2 cups pitted dates, soaked in water overnight, and drained
3 tablespoons unsweetened cocoa powder
2 tablespoon melted coconut oil
1 teaspoon brandy flavoured essence
dessicated coconut for rolling
If you have a good quality blender, then this is easy - blitz all the ingredients until smooth. If, like me, you aren't blessed with the disposable income a good blender requires, this recipe is still totally do-able. Chop the dates into four pieces each, place in a mixing bowl with the melted coconut oil and mash and stir with a wooden spoon until smooth. Add the cocoa powder gradually and keep mixing so there are no dry lumps. The more you stir the smoother it will get, I promise.
Use a teaspoon to measure out each truffle then roll in dessicated coconut until it's able to hold its own shape.
Refrigerate for an hour before serving, and keep in the fridge if it's a warm day.
Thursday, December 3, 2015
Gluten Free, Vegan Chocolatey Christmassy Tifle!!
December has arrived! Sure, my Christmas tree has been up for three weeks already, and I've already had a Christmas party, but now we've hit that final month on the calendar, I feel like I can really let my Christmas Freak Flag fly! I don't know how I became such a Christmas geek, but if four consecutive holiday seasons working in retail can't jade me, I don't think anything ever will!
Being English-born, I have a complex idea of what the spirit of Christmas really is. Yes, I think of barbecues, pavlovas and cold beers as essentials of the big day, but I still have fond, if distant, memories, of the English school Christmas lunch, in which we all sat around long tables in the dining hall and ate turkey and overcooked brussels sprouts inbetween snowman-building competitions. And while I don't know yet if a box of Scorched Almonds is more "Christmassy" than a Terry's Chocolate Orange, I do know that the magic of Christmas and the peace of a New Zealand summer are a pretty damn good fit!
At the "Friendmas" dinner I recently hosted, I asked everyone to bring along their must-have Christmas dish in the hopes of a bountiful Christmas-themed potluck, and to find out which foods bring out the most nostalgia. I was really excited to see what everyone would bring until I realised that I too would have to make a decision about what to make! Ok, what Christmas dish can I not live without? From the title of this post, you'd assume the answer is "trifle" but it's not that simple!
After careful consideration, I decided the two things that make Christmas day different to every other are 1) socially acceptable day-drinking and 2) desserts all damn day. And since I'm both unwilling to just serve up booze at a dinner party and personally living alcohol-free right now, I had to settle for dessert (poor me!). At home, we've never had a "standby" or "must have" Christmas dessert. Instead we rotate between Christmas pudding (the brandy-soaked, ablaze kind), berry-filled pavlova or some kind of cake+cream/custard combo, if not a combination of all of the above. It's worth mentioning that this is after eating pancakes for breakfast and a half-box each of Rose's chocolates for lunch! Well, if you can't on Christmas day, when can you?
Instead of trying to pick one dessert to serve, I found the answer in trifle - basically all the desserts you can think of, artfully piled on top of one another. It hits all the right flavour notes - chocolate, booze, berries, plus all those wintry-warm spices - while being gluten-free, (mostly) alcohol-free, and suitable for vegans. Winning!

Being English-born, I have a complex idea of what the spirit of Christmas really is. Yes, I think of barbecues, pavlovas and cold beers as essentials of the big day, but I still have fond, if distant, memories, of the English school Christmas lunch, in which we all sat around long tables in the dining hall and ate turkey and overcooked brussels sprouts inbetween snowman-building competitions. And while I don't know yet if a box of Scorched Almonds is more "Christmassy" than a Terry's Chocolate Orange, I do know that the magic of Christmas and the peace of a New Zealand summer are a pretty damn good fit!
At the "Friendmas" dinner I recently hosted, I asked everyone to bring along their must-have Christmas dish in the hopes of a bountiful Christmas-themed potluck, and to find out which foods bring out the most nostalgia. I was really excited to see what everyone would bring until I realised that I too would have to make a decision about what to make! Ok, what Christmas dish can I not live without? From the title of this post, you'd assume the answer is "trifle" but it's not that simple!
After careful consideration, I decided the two things that make Christmas day different to every other are 1) socially acceptable day-drinking and 2) desserts all damn day. And since I'm both unwilling to just serve up booze at a dinner party and personally living alcohol-free right now, I had to settle for dessert (poor me!). At home, we've never had a "standby" or "must have" Christmas dessert. Instead we rotate between Christmas pudding (the brandy-soaked, ablaze kind), berry-filled pavlova or some kind of cake+cream/custard combo, if not a combination of all of the above. It's worth mentioning that this is after eating pancakes for breakfast and a half-box each of Rose's chocolates for lunch! Well, if you can't on Christmas day, when can you?
Instead of trying to pick one dessert to serve, I found the answer in trifle - basically all the desserts you can think of, artfully piled on top of one another. It hits all the right flavour notes - chocolate, booze, berries, plus all those wintry-warm spices - while being gluten-free, (mostly) alcohol-free, and suitable for vegans. Winning!

Wednesday, November 18, 2015
Breakfast Rice Porridge
For various reasons, I've been experimenting lately with cutting down on my wheat, dairy and egg consumption which has left me in a bit of a pickle over breakfast. It's no secret that breakfast is my favourite meal of the day. I'm an inconsistent eater and will often skate through a day on two big main meals (breakfast and an early dinner) and a few snacks and thanks to the gap between dinner and morning I often wake up hungry: a delicious and filling breakfast gives me something to get out of bed for and keeps me smiling well through the morning. Don't get me wrong, Marmite on toast has its place, but I'd much rather start the day with a stack of "paleo" banana pancakes or a classic bacon and egg combo and not have to stop at 10 for morning tea to quiet a growling tum!
Enter porridge... now, I've personally never been a big fan of porridge but after talking to my mum about the ins and outs and alternatives to oats it dawned on me that I could turn one of my favourite desserts - hearty, creamy, old fashioned English rice pudding - into a wholesome and healthy breakfast that's both eggless and actually enjoyable.
Now, I know rice porridge is not news. I've encountered traditional rice porridge, or congee, in a few forms before, most notably in unfortunately bland airline-food form on a long-haul flight. Traditionally, congee is made with white rice and slow cooked in water, served either sweet or savoury and as a side or main component to any meal, not just breakfast. It's also just not for me, I guess a combination of its nutritional profile and texture just doesn't suit my increasingly fussy palette. I wanted to try creating something closer to the rice pudding I grew up with, with the texture of wholegrains and a few nutritional additions to keep me satiated all morning.
 |
| Porridge ain't porridge without a square of chocolate :) |
Tuesday, June 23, 2015
Home Made Baked Beans!
As I wrote in my last post, I am so over prescriptivist diets (further rants to be had on this matter I'm sure!). My personal gastronomic belief system boils down to three core practices:
- read the science yourself
- experiment with what works best for you
- eat lots of vegetables in the mean time.
So, today's recipe might not fit any of those fancy diets out there (oh god I sound out of touch) but I promise it is healthy, easy and inexpensive. This is a simple recipe to ease me back into blogging but it beats regular old baked beans in both flavour and nutrition and is a great go-to for students.
Ingredients
Half a chopped onion (50c)
1 can red kidney beans ($1.80)
1 can unflavoured chopped tomatoes (80c)
1 stock cube (20c) dissolved in two tablespoons of hot water
1 tsp paprika (20c)
1 tsp thyme (20c)
1/2 tsp mixed spice (10c)
1/2tsp dried coriander (10c)
Method
Preheat the oven to 180 celsius.
Put all the ingredients in a small baking tray (a slice tin works well) and stir it up.
Bake for 30-40 minutes until thick and bubbly, stirring occasionally to stop the edges browning.
Makes 4 serves.
Serve with seasonal veggies or a jacket potato.
Cost works out to just under $1 per serve.
I would not recommend putting the oven on just to cook one thing as it's an expensive way to cook! Now is the time to put in your loaf of bread or pop in a potato to bake.
Saturday, April 11, 2015
I'm baa-aack
Hey guys,
A lot has changed for me since my last post. I've moved to a new city, started studying for my Master's and read a LOT of food research that has led to many changes in my dietary habits. Now that I'm back on a student budget and food is on my brain more than ever before, I want to start writing on the topic again. I don't want to make any promises about content or frequency of posts but stay tuned if you are interested in non-prescriptivist diets, low carb recipes and interesting food science facts.
xx Aimee
A lot has changed for me since my last post. I've moved to a new city, started studying for my Master's and read a LOT of food research that has led to many changes in my dietary habits. Now that I'm back on a student budget and food is on my brain more than ever before, I want to start writing on the topic again. I don't want to make any promises about content or frequency of posts but stay tuned if you are interested in non-prescriptivist diets, low carb recipes and interesting food science facts.
xx Aimee
Wednesday, July 9, 2014
Kitchen 101: Homemade Bread
I feel a little like I'm giving away a family secret in writing this but to be honest I think everyone should know how to make their own bread. It's pretty simple once you get the hang of it (even easier if you have a bread maker!) and while no written post is the same as being taught in person, I'm going to do my best to share the basics of bread making with you now.
I've thought a lot about how to go about this and I think the easiest way will be to share my basic recipe and get to important technical things as they come up.
I use just one recipe, which I alter if I want to make something a little healthier or more exciting. The ingredients list is simple and short and of all the recipes I love, it's the only one I know off by heart.
Knowing how to make bread is awesome if you are doing a pantry challenge since the ingredients are fairly standard and you can use the dough for things like pizza bases and lunchbox bread rolls.
Tuesday, July 8, 2014
Pantry Challenge: Milo Slice
The great thing about "slice" is that unlike cake or biscuits, there isn't really a required recipe or a formula - as long as you've got a good balance between fat, flour and sugar you're good to go. A slice is a great opportunity to use up random baking stuff from your pantry since it's pretty hard to go wrong.
This was based on a recipe for a Milo slice from Lift the Lid which I adapted and altered to use up a few things. The trick with any slice recipe is, essentially, that no matter what flour, oats or dried fruits you add, you add enough liquid (melted margarine usually) that it holds together and that you don't dry it out by cooking it for too long.
 |
| Pictured: random baking stuff |
This was based on a recipe for a Milo slice from Lift the Lid which I adapted and altered to use up a few things. The trick with any slice recipe is, essentially, that no matter what flour, oats or dried fruits you add, you add enough liquid (melted margarine usually) that it holds together and that you don't dry it out by cooking it for too long.
Monday, July 7, 2014
Pantry Challenge: Peachy Baked Chicken
As promised, I'm using whatever I can find in the kitchen to make inventive meals this week. Tonight's recipe is a baked chicken casserole. I was going for apricot and ginger but for some reason I have about five cans of sliced peaches so I went in that direction instead!

Raiding the pantry and freezer can be an interesting task, but in amongst the dead celery and year-old frozen pie, I found a large tray of chicken legs, a tin of peaches, some fresh ginger and a half can of chopped tomatoes. With those ingredients, this meal was a bit of a no-brainer and I'm kind of nervous about what the rest of the week holds - I'm pretty sure I just used up all the hidden gems but we'll see...!
I cooked this in the oven since I also wanted to do a bit of baking, it took about an hour and a half so I think it would make a great slow cooker meal. There is enough sugar in the fruit to provide a glaze for the chicken (which is slow cooked and soft with a yummy crunchy skin) and there's enough sharpness from the ginger and depth from the worcester sauce that the dish isn't too sweet.
Subscribe to:
Posts (Atom)